CRUD for Post
Create, Read, Update, and Delete are the four operations that makeup CRUD in a database. Application reading and manipulation of data contained in tables is made possible by Active Record automatically.
For this article, we will build a Rails CRUD Post and briefly show how Rails interacts with a database.
Table of contents
What is MVC?
In order to understand the flow of Rails, let’s talk about Rails principle which is MVC architecture. Model-View-Controller, or MVC, is a design pattern used to partition an application’s concerns.

A browser sends a request while interacting with our application, which is acknowledged by a web server and forwarded to the Rails routing engine. Based on the routing URL pattern, the router accepts the request and leads the user to the correct controller class method.
After then, the controller takes charge. In some circumstances, the controller renders a view for the browser right away. The controller typically engages with a model on dynamic websites.
The controller then produces the final view (HTML, CSS, and pictures) following the model’s invocation and sends the entire web page back to the user’s browser.
- Models
The model file is a class in Ruby. It will inherit fromActiveRecord::Baseand has a corresponding database table. It may make use of a number of methods from Ruby libraries to help it interact with the database, making methods and data characteristics that the controller or view shouldn’t be aware of for security purposes. - Views
Views are templates that often combine HTML and Ruby code to render data from your models and manage presentation logic that end users see and interact with. - Controller
Controller is the middleman between the model and the view controlling the flow of the application. They handle the requests, initiates changes to the model, redirects, etc.
Convention over configuration
By assuming that we would adhere to the recommended practices, Rails utilizes a default set of conventions. We won’t need to configure many things manually if we stick to the conventions. Rails handles a lot of scenarios for us in a fantastic way.
Depending on their particular interests, configurations and procedures can vary from developer to developer. As a result, it is challenging to examine and keep track of the various procedures used when working in a team. Because of this, the convention over configuration principle of Rails is generally acknowledged.
Index
In this section, we will create our posts index action. Index page typically displays all the records of a certain model, in our case we will be displaying Post.
Let’s generate our post controller! Open up your container terminal and type: rails generate controller PostsController index --no-test-framework
root@0122:/usr/src/app# rails generate controller PostsController --no-test-framework --no-helper
create app/controllers/posts_controller.rb
route get 'posts/index'
invoke erb
create app/views/posts
create app/views/posts/index.html.erb
Reminder:
When a request is received, Rails checks the route file to decide which controller action to execute. Once the request has been interpreted, the selected route-controller procedure will be executed.
Read Carefully:
Rails offers a
resourcerouting that allows you to quickly declare all the common routes for a given resourceful controller. A single call to resources can declare all the necessary routes for yourindex,show,new,edit,create,update, anddestroyactions.
Make a resourceful route, change the generated get 'posts/index' to resources :posts on your routes config.
# config/routes.rb

Rails.application.routes.draw do
- get 'posts/index'
  # Define your application routes per the DSL in https://guides.rubyonrails.org/routing.html

  # Defines the root path route ("/")
  root 'welcome#index'
+
+ resources :posts
end
You can check your routes with rails routes command.
root@0122:/usr/src/app# rails routes
Prefix Verb URI Pattern Controller#Action
root GET / welcome#index
posts GET /posts(.:format) posts#index
POST /posts(.:format) posts#create
new_post GET /posts/new(.:format) posts#new
edit_post GET /posts/:id/edit(.:format) posts#edit
post GET /posts/:id(.:format) posts#show
PATCH /posts/:id(.:format) posts#update
PUT /posts/:id(.:format) posts#update
DELETE /posts/:id(.:format) posts#destroy
On your PostsController#index, let’s get all the posts record and put it in variable @posts.
# app/controllers/posts_controller.rb

class PostsController < ApplicationController
  def index
+   @posts = Post.all
  end
end
This @posts variable is accessible to your view. Let’s try implementing each in our @posts variable and display it on our view using <table>.
<!-- app/views/posts/index.html.erb -->

- <h1>Posts#index</h1>
- <p>Find me in app/views/posts/index.html.erb</p>
+ <h1>Post List</h1>
+
+ <table>
+   <thead>
+     <td>title</td>
+     <td>content</td>
+     <td>action</td>
+   </thead>
+   <% @posts.each do |post| %>
+     <tr>
+       <td><%= post.title %></td>
+       <td><%= post.content %></td>
+       <td></td>
+     </tr>
+   <% end %>
+ </table>
Let’s take a look at our posts. Since our route for index is /posts, browse localhost:3000/posts

New
The next action is posts new. New action is the one responsible for generating new instance of an object. It will be rendered to view in order for the user to fill out with the use of form.
# app/controllers/posts_controller.rb

class PostsController < ApplicationController
  def index
    @posts = Post.all
  end
+
+ def new
+   @post = Post.new
+ end
end
Next step is creating a view for posts new. touch app/views/posts/new.html.erb and add the these codes:
<!-- app/views/posts/new.html.erb -->
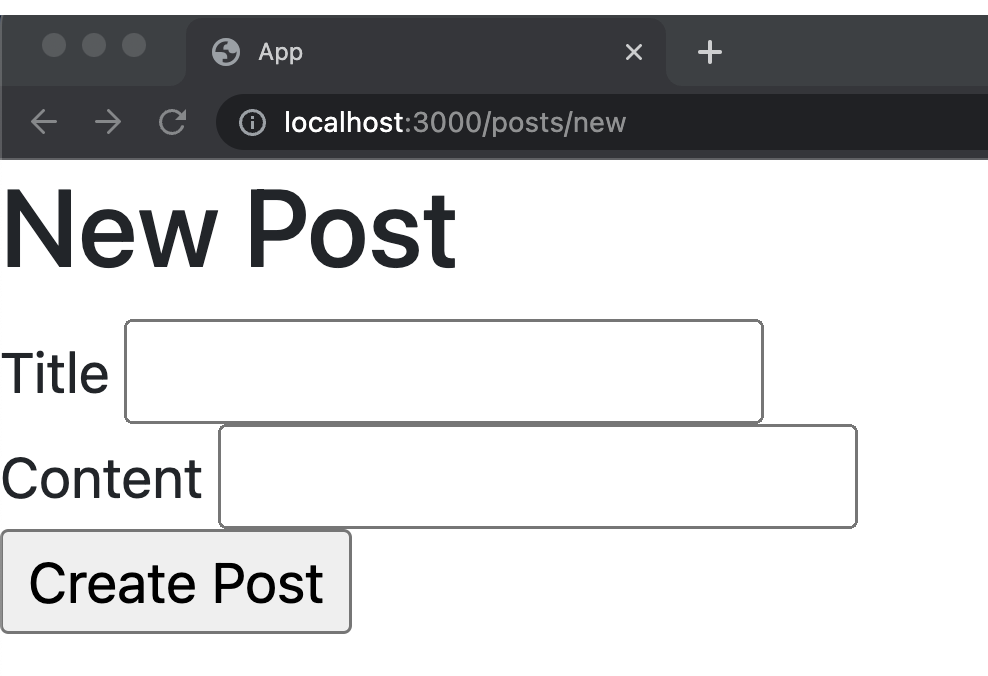
<h1>New Post</h1>
<%= form_with model: @post do |form| %>
<div>
<%= form.label :title %>
<%= form.text_field :title %>
</div>
<div>
<%= form.label :content %>
<%= form.text_field :content %>
</div>
<%= form.submit %>
<% end %>
Rails offers an action view helpers, and one of these is the form helper form_with. The form helper form_with creates a form tag based on mixing URLs, scopes, or models. What we use here in our example is model.
Take a look at the outcome of post new page, route is posts/new.
Create
Upon clicking the Create Post, it will redirect to route posts/create and call your posts_controller create action. In here you can process the creation of your new post.
But before that, let’s take a look of what is being passed through your create action when you submit a post by using debugger.
Read Carefully:
The
debuggeris under thedebuggem. The debugger is your greatest option when you truly need to explore into your running source code.
Try using debugger on our posts create action.
# app/controllers/posts_controller.rb

class PostsController < ApplicationController
  # ...
+
+ def create
+   debugger
+ end
end
Now submit a new post. On your new post page, fill out the title and content then click the Create Post button.
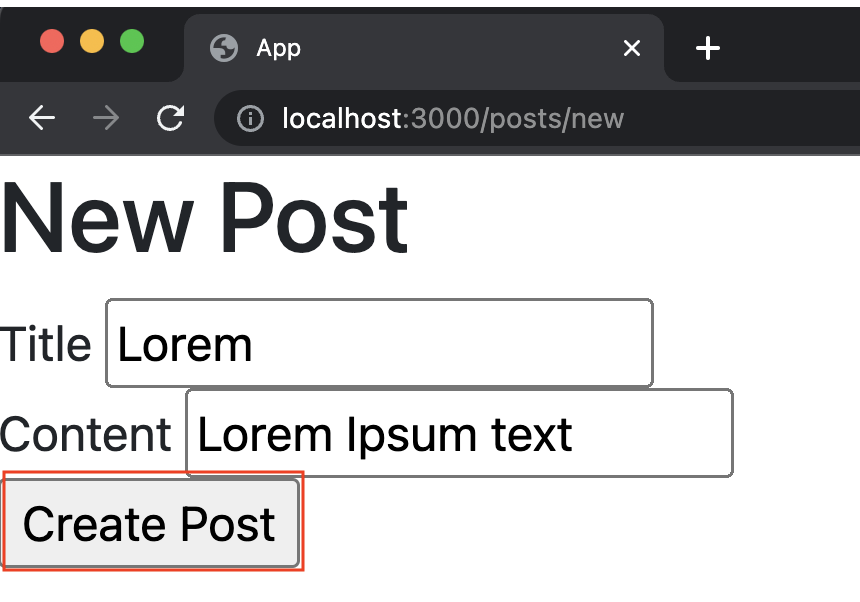
After submitting the post, notice that the submission of form is paused. Take a look at your development logs.
Started POST "/posts" for 172.24.0.1 at xxxx-xx-xx xx:xx:xx +0000
Cannot render console from 172.24.0.1! Allowed networks: 127.0.0.0/127.255.255.255, ::1
Processing by PostsController#create as HTML
  Parameters: {"authenticity_token"=>"[FILTERED]", "post"=>{"title"=>"Lorem", "content"=>"Lorem Ipsum text"}, "commit"=>"Create Post"}
[6, 13] in /usr/src/app/app/controllers/posts_controller.rb
     6|   def new
     7|     @post = Post.new
     8|   end
     9|
    10|   def create
=>  11|     debugger
    12|   end
    13| end
=>#0    PostsController#create at /usr/src/app/app/controllers/posts_controller.rb:11
  #1    ActionController::BasicImplicitRender#send_action(method="create", args=[]) at /usr/local/bundle/gems/actionpack-7.0.4/lib/action_controller/metal/basic_implicit_render.rb:6
  # and 75 frames (use `bt' command for all frames)
(rdbg)
In here, you can already see the parameters that has been passed coming from new post form. You can also take a closer look and do more by accessing the params. Inside that is your post object.
(rdbg) params
#<ActionController::Parameters {"authenticity_token"=>"bkgoIV57h7q2gnUbnhkXyBvWaa5JKrdPj1aB8_mlYcvQVfX_h1Pb-i_8VJwKifbPNpOYE4Y4J1TNsT7DKv72EQ", "post"=>{"title"=>"Lorem", "content"=>"Lorem Ipsum text"}, "commit"=>"Create Post", "controller"=>"posts", "action"=>"create"} permitted: false>
(ruby) params[:post]
#<ActionController::Parameters {"title"=>"Lorem", "content"=>"Lorem Ipsum text"} permitted: false>
(rdbg)
Read Carefully:
As you can see, the
params[:post]contains thetitleandcontentthat you inputted on thenewpost form. Do take note ofpermitted: falseargument on your parameter, we will discuss what it stands for later.
To continue the submission of your request and leave the debugger, just type c.
(rdbg) c    # continue command
No template found for PostsController#create, rendering head :no_content
Completed 204 No Content in 676799ms (Allocations: 91879)
Now that we know how to access the parameters, let’s code our post create action.
# app/controllers/posts_controller.rb

class PostsController < ApplicationController
  # ...
  def create
-   debugger
+   post = Post.new(params[:post])
+   if post.save
+     redirect_to posts_path
+   end
  end
end
Try to submit a new post.
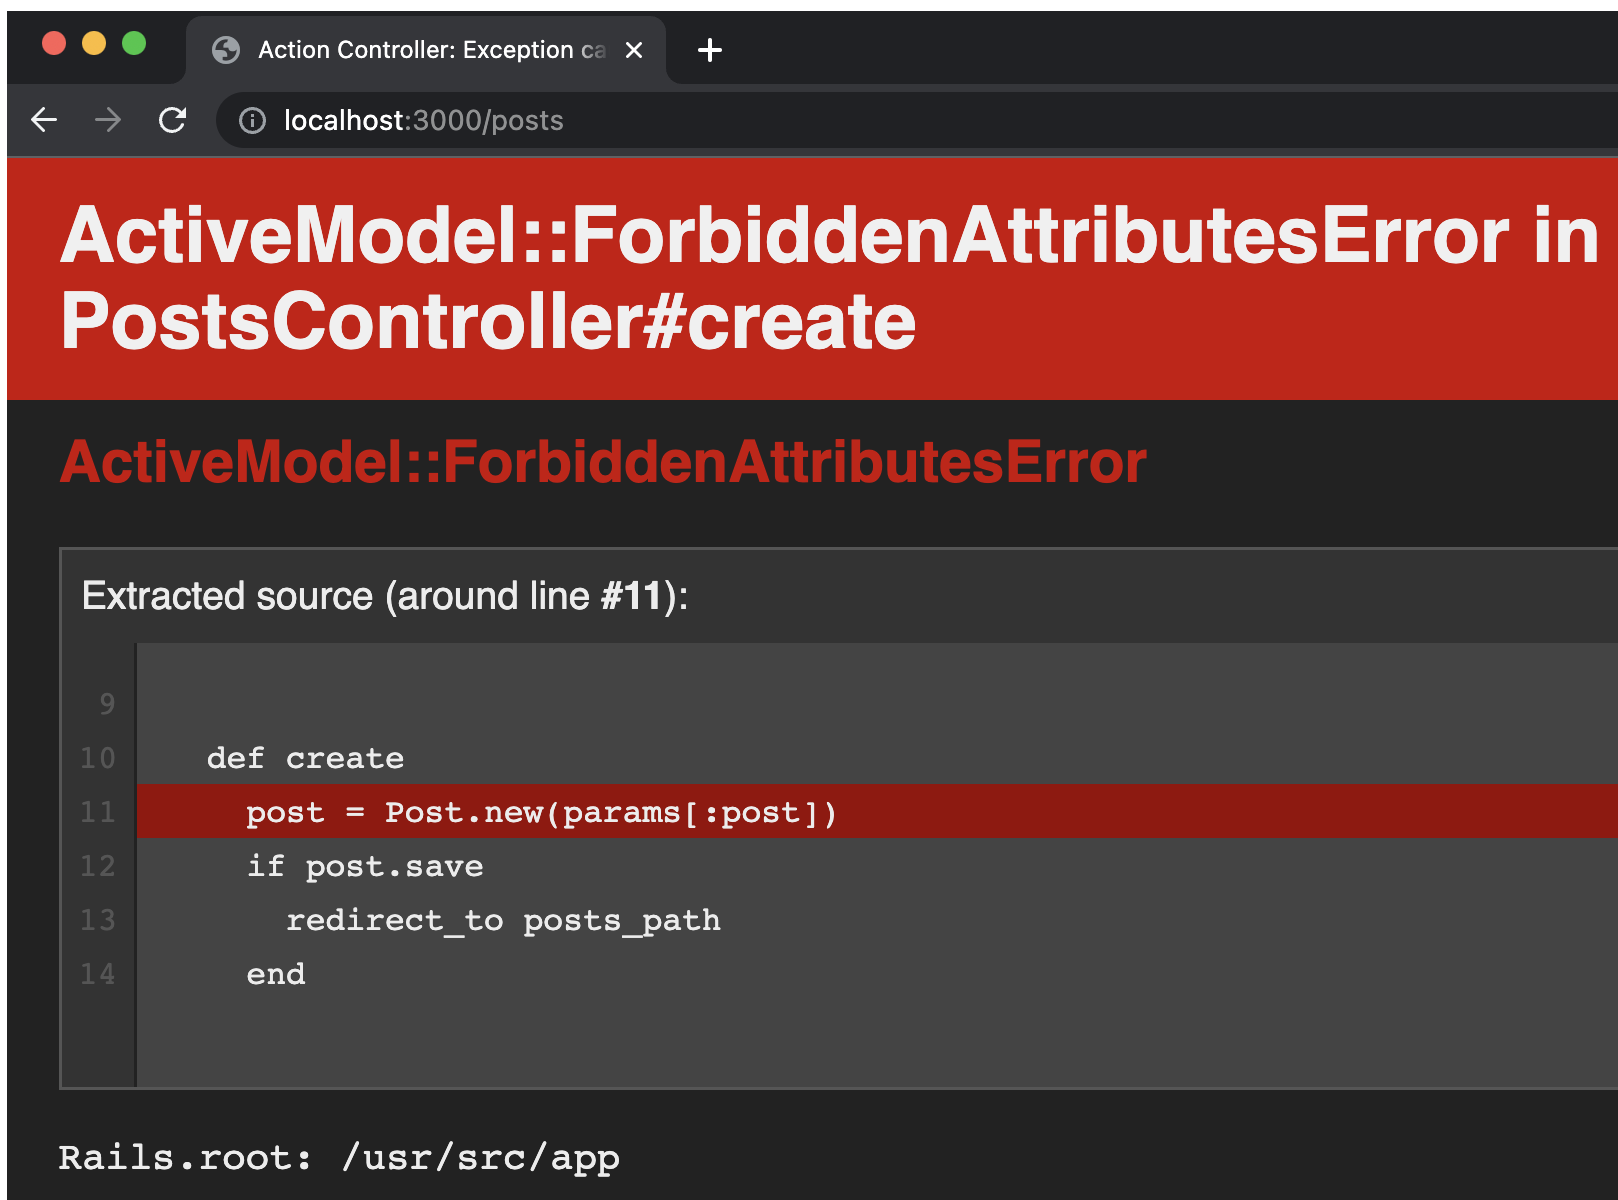
Reminder:
Rails prohibits the use of Active Model mass assignments unless they have been permitted. Because of
Strong Parameters, when you submit an unpermitted parameter, rails will throwActiveModel::ForbiddenAttributesError. This implies that we will have to decide in advance which attributes to allow for mass save/update.
Read Carefully:
In order to allow our parameters, we have to use
permitmethod. For the post parameters, what we need to permit iscontentandtitleattributes. In our code it will beparams[:post].permit(:title, :content).
# app/controllers/posts_controller.rb

class PostsController < ApplicationController
  # ...
  def create
-   post = Post.new(params[:post])
+   post = Post.new(params[:post].permit(:title, :content))
    if post.save
      redirect_to posts_path
    end
  end
end
Try to create a new post again.
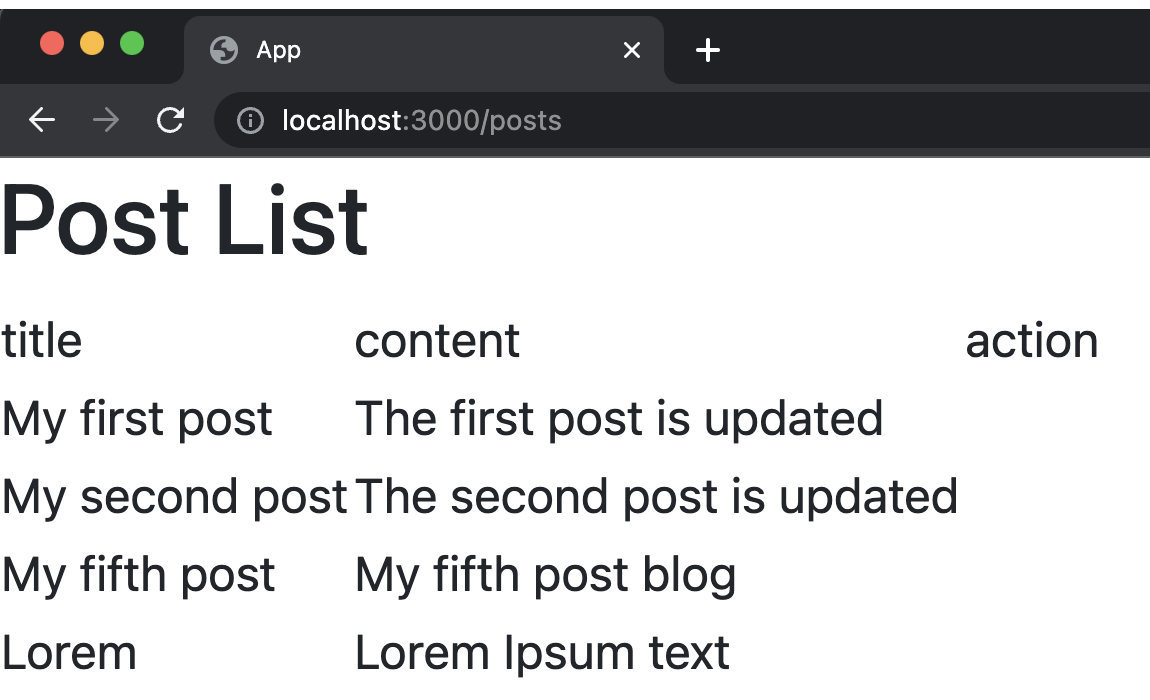
It will now create a post and redirect you to index post.
Note:
The one responsible for redirection is the
redirect_tomethod, and it will be redirected to theoptionyou specified.
How do I know the option to give in the redirect_to method? When you build a resourceful route, it will also make a lot of helpers available to your application’s controllers including the url helper.
Read Carefully:
The format of url helper is concatenating the
prefixwith_path(prefix_path). You can see theprefixwithrails routescommand. For example the prefix of postsindexpage isposts, therefore the url helper isposts_path. If you’re unsure, another option is to browserails/info/routesto see the lists of routes and their info.
| Helper | HTTP Verb | Path | Controller#Action |
|---|---|---|---|
| Path/Url | |||
| root_path | GET | / | welcome#index |
| posts_path | GET | /posts(.:format) | posts#index |
| POST | /posts(.:format) | posts#create | |
| new_post_path | GET | /posts/new(.:format) | posts#new |
| edit_post_path | GET | /posts/:id/edit(.:format) | posts#edit |
| post_path | GET | /posts/:id(.:format) | posts#show |
| PATCH | /posts/:id(.:format) | posts#update | |
| PUT | /posts/:id(.:format) | posts#update | |
| DELETE | /posts/:id(.:format) | posts#destroy |
Active Record Validation
In this section, we’ll use Active Record’s validations feature to check whether objects are valid before storing them in the database.
Why do we use validations?
Validations are used to make sure that only correct data is saved into your database. The easiest way to guarantee that only valid data is put into your database is to use model-level validations. Let’s add a simple validation in out Post model.
# app/models/post.rb

class Post < ApplicationRecord
+ validates :title, presence: true
+ validates :content, presence: true
end
Read Carefully:
This validation prevents blank title and content from being saved.
Rails havevalid?method that starts your validations and outputs true or false depending on whether errors are discovered.
Open up your rails console and let’s test the posts title and content attributes validation by using the valid? method.
irb(main):001:0> Post.create(title: '', content: '' ).valid?
=> false
irb(main):002:0> Post.create(title: '', content: 'Lorem 2').valid?
=> false
irb(main):003:0> Post.create(title: 'Lorem', content: '').valid?
=> false
irb(main):004:0> Post.create(title: 'Lorem', content: 'Lorem 2').valid?
  TRANSACTION (0.3ms)  BEGIN
  Post Create (0.4ms)  INSERT INTO `posts` (`title`, `content`, `created_at`, `updated_at`) VALUES ('Lorem', 'Lorem 2', 'xxxx-xx-xx xx:xx:xx.xxxxxx', 'xxxx-xx-xx xx:xx:xx.xxxxxx')
  TRANSACTION (0.7ms)  COMMIT
=> true
irb(main):005:0> Post.last
  Post Load (0.4ms)  SELECT `posts`.* FROM `posts` ORDER BY `posts`.`id` DESC LIMIT 1
=> #<Post:0x000055de082fde60 id: 8, title: "Lorem", content: "Lorem 2", created_at: xxx, xx xxx xxxx xx:xx:xx.xxxxxxxxx UTC +xx:xx, updated_at: xxx, xx xxx xxxx xx:xx:xx.xxxxxxxxx UTC +xx:xx>
We now know that the validation is working but this will have a problem. Let’s go to our new post page and create a post with blank content and title.
![]()
Read Carefully:
When you submit the form it will redirect back to your
new?post page. That is because of the validation. In our controller we put a conditionif @post.save, since we have blanktitleandcontentit will not be valid, causing the post to not save. In this instance,@post.savewill return false and redirect back to our new post page.
Error Messages
The problem we have right now is for the user experience. If you are the user, you will feel lost and think that it’s broken because in your perspective, nothing is happening.
Read Carefully:
We should display the errors that occurred upon validation to the new post page by using the Active Model Errors
errorsmethod. Theerrorsmethod returns an array ofErrorobjects of your model.
Before adding the errors, we should edit our posts create action first. If you still remember, we only used a local variable post before, but what we need right now is an instance variable in order to access it in our view.
# app/controllers/posts_controller.rb

class PostsController < ApplicationController
  # ...
  def create
-   post = Post.new(params[:post].permit(:title, :content))
-   if post.save
+   @post = Post.new(params[:post].permit(:title, :content))
+   if @post.save
      redirect_to posts_path
+   else
+     render :new, status: :unprocessable_entity
    end
  end
end
We also need to make sure that the page will be redirected back to the new post page with all the instance variable intact, that’s why we need use the render method. Additionally, we can supply it with option http status with value of unprocessable_entity.
Now we just need to display the error’s on our new posts page.
<!-- app/views/posts/new.html.erb -->

  <h1>New Post</h1>
+ <% if @post.errors.any? %>
+   <ul>
+     <% @post.errors.each do |error| %>
+       <li><%= error.full_message %></li>
+     <% end %>
+   </ul>
+ <% end %>
  <%= form_with model: @post do |form| %>
    <!-- ... -->
First we will check if our posts have any errors @post.errors.any?. If there’s an error, we will proceed with iterating through each of the @post errors.
The errors it encountered will now be displayed when we repeat the process of creating a post with blank content and a new title.
![]()
Flash Messages
Aside from error messages we can also use flash messages to give the users some context about what happened to the request they submitted or the actions they made. Flash messages appears in the page where the user is redirected to after submitting a request.
We can work with these notification messages using the flash helper method. It behaves a lot like a Ruby hash. The flash object has methods like keys, any? or each and you can access a particular message with [].
Reminder:
Flash messages aren’t the same as error messages from validation. Validations are associated with the model object, and we access these validation messages with the
errorsmethod just like what we did above in the error messages topic.
The first thing we should do is to add the tags for the flash messages in application layout.
<!-- app/views/layouts/application.html.erb -->

<!-- ... -->
  <body>
+   <% if flash[:notice] %>
+     <p class="notice"><%= notice %></p>
+   <% end %>
+   <% if flash[:alert] %>
+     <p class="alert"><%= alert %></p>
+   <% end %>
    <%= yield %>
  </body>
<!-- ... -->
<%= notice %> and <%= alert %> will serve as the tags to where the messages from flash[:notice] and flash.now[:alert] will be display respectively.
The next step is to set the flash in our controller.
# app/controllers/posts_controller.rb

class PostsController < ApplicationController
  # ...
  def create
    @post = Post.new(params[:post].permit(:title, :content))
    if @post.save
+     flash[:notice] = 'Post created successfully'
      redirect_to posts_path
    else
+     flash.now[:alert] = 'Post create failed'
      render :new, status: :unprocessable_entity
    end
  end
end
Read Carefully:
Notice that we called the method
nowfor the secondflash, but we didn’t do it for the first one. This is because if yourenderon the same action to which you’re setting the flash message, that flash message will be available, but will NOT be removed. So it will stay around and potentially be shown twice. You only need to useflash.nowif you’re going to render instead of redirecting.
Since we already have Bootstrap, you can beautify your flash by using Bootstrap alerts. You can also design your own css.
Finally, you can test it now. After performing an action or submitting a request, the flash message should appear on the top of the page you were redirected to.
Show
The show action, just as the name implies, shows the data of our record. Show is the Read in our crud. Our shows route takes up a parameter id, where the id is your post id. That parameter id will serve as a basis of what post you will query and show in the page.
In our PostsController, add new show action and find the post with the given parameter id.
# app/controllers/posts_controller.rb

class PostsController < ApplicationController
  # ...
+
+ def show
+   @post = Post.find(params[:id])
+ end
end
Next is our view, display the attributes of your post.
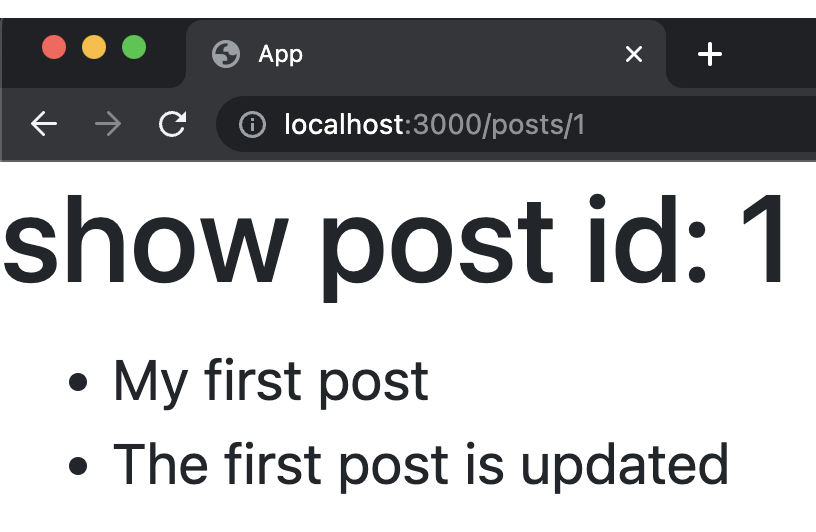
<!-- app/views/posts/show.html.erb -->

<h1>show post id: <%= @post.id %></h1>
<ul>
  <li><%= @post.title %></li>
  <li><%= @post.content %></li>
</ul>
We can now show the details of one of our posts, browse posts/1
Edit
Edit is just like our show page. It takes up a parameter id. The only difference is we have to put our view into form and display the error messages.
# app/controllers/posts_controller.rb

class PostsController < ApplicationController
  # ...
+
+ def edit
+   @post = Post.find(params[:id])
+ end
end
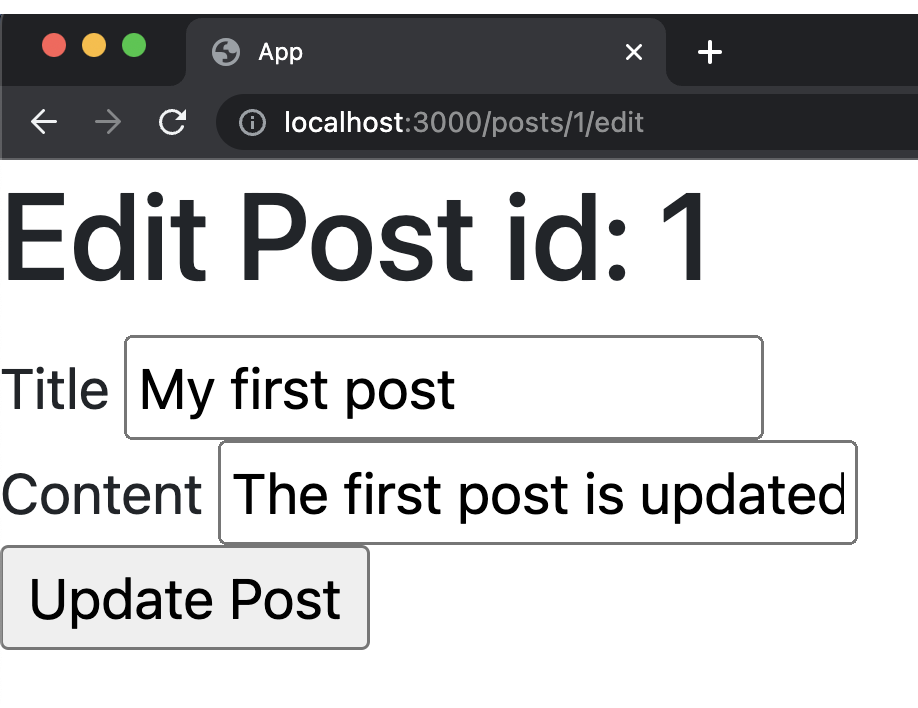
<!-- app/views/posts/edit.html.erb  -->

<h1>Edit Post id: <%= @post.id %></h1>
<% if @post.errors.any? %>
  <ul>
    <% @post.errors.each do |error| %>
      <li><%= error.full_message %></li>
    <% end %>
  </ul>
<% end %>
<%= form_with model: @post do |form| %>
  <div>
    <%= form.label :title %>
    <%= form.text_field :title %>
  </div>
  <div>
    <%= form.label :content %>
    <%= form.text_field :content %>
  </div>
  <%= form.submit %>
<% end %>
You can access the posts edit page with /posts/{:id}/edit. Let’s try our post with id 1, /posts/1/edit.
Update
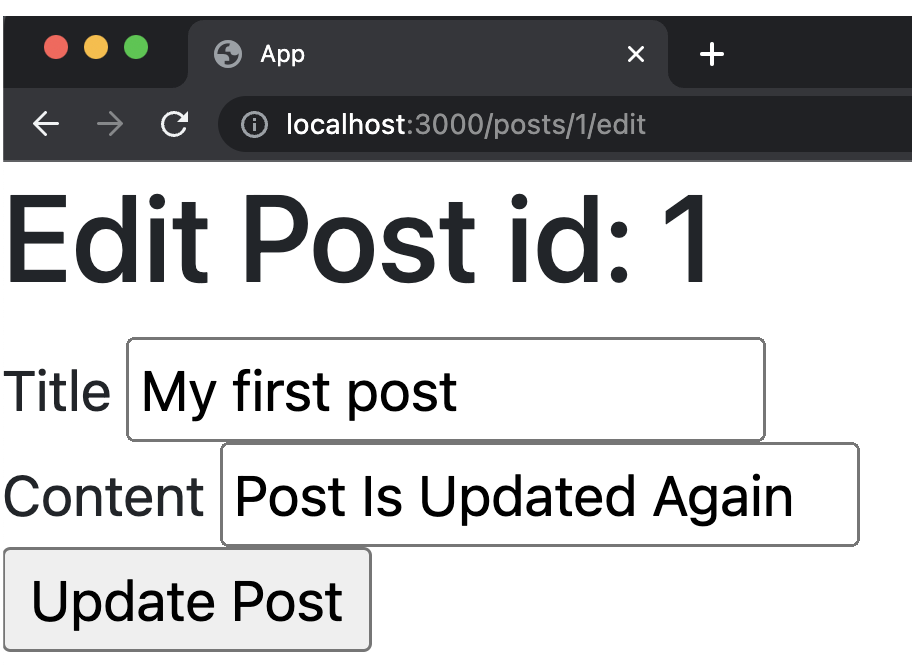
The update route also takes up a parameter id. Just like in create, we have to permit the attributes that we need.
# app/controllers/posts_controller.rb

class PostsController < ApplicationController
  # ...
+
+ def update
+   @post = Post.find(params[:id])
+   if @post.update(params.require(:post).permit(:title, :content))
+     flash[:notice] = 'Post updated successfully'
+     redirect_to posts_path
+   else
+     flash.now[:alert] = 'Post update failed'
+     render :edit, status: :unprocessable_entity
+    end
+ end
end
In here we noticed that we need to have a title and content. Although it is already being checked in model level, we can also do it in controller for extra measures.
Read Carefully:
We can check the presence of attributes in controller level by adding the
requiremethod in our parameters. Methodrequirefinds the list of attributes that you specified in the parameters. If there’s a missing attribute on your list, it will throw an error.
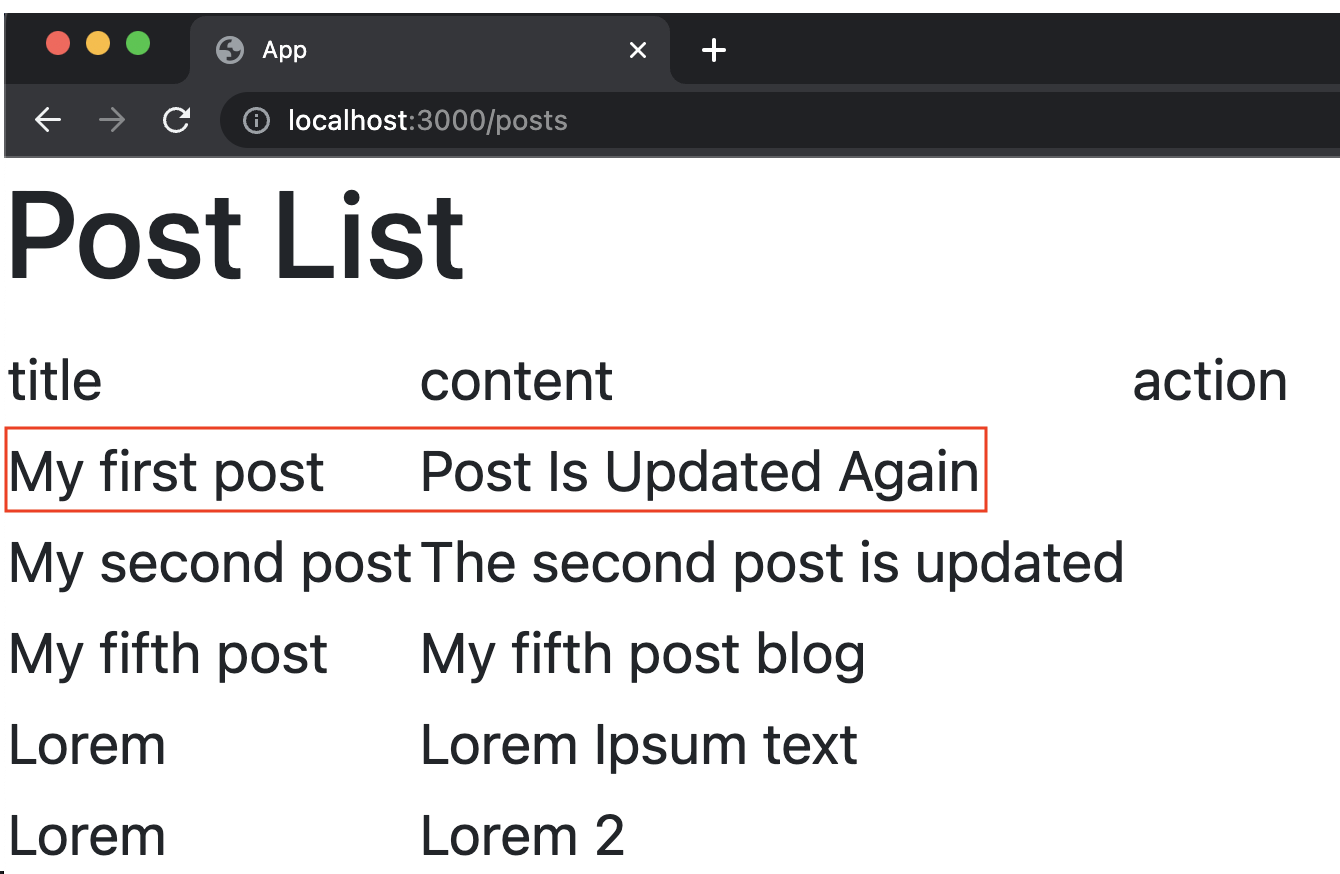
Try updating our post.
Links
We can create a hyperlink to the current main document with the aid of the rails link_to helper. Simply put, the link_to helper creates links. It also includes parameters and queries in the redirection path in addition to directing the user from one page to another.
We will use link_to to add links in our index page going to new, show, and edit pages. At the same time, we will also add link going back to our index page in each of those pages.
<!-- app/views/posts/index.html.erb -->

  <h1>Post List</h1>

  <table>
    <!-- ... -->
    <% @posts.each do |post| %>
      <tr>
        <td><%= post.title %></td>
        <td><%= post.content %></td>
-       <td></td>
+       <td>
+         <%= link_to 'Show', post_path(post) %>
+         <%= link_to 'Edit', edit_post_path(post) %>
+       </td>
      </tr>
    <% end %>
  </table>
+
+ <%= link_to 'New', new_post_path %>
<!-- app/views/posts/new.html.erb -->

<!-- ... -->
+
+ <%= link_to 'Index', posts_path %>
<!-- app/views/posts/show.html.erb -->

<!-- ... -->
+
+ <%= link_to 'Index', posts_path %>
<!-- app/views/posts/edit.html.erb -->

<!-- ... -->
+
+ <%= link_to 'Index', posts_path %>
Destroy
The destroy also takes up a parameter id to find which object we are deleting form our database.
# app/controllers/posts_controller.rb

class PostsController < ApplicationController
  # ...
+
+ def destroy
+   @post = Post.find(params[:id])
+   @post.destroy
+   flash[:notice] = 'Post destroyed successfully'
+   redirect_to posts_path
+ end
end
Add button_to for destroy action in posts index page.
<!-- app/views/posts/index.html.erb -->

<!-- ... -->
  <td>
    <%= link_to 'Show', post_path(post) %>
    <%= link_to 'Edit', edit_post_path(post) %>
+   <%= button_to 'Delete', post_path(post), method: :delete %>
  </td>
<!-- ... -->
The function button_to creates a form with a single button that submits to the URL established by the group of options. This is the most secure way to make sure that search engines or accelerators aren’t involved with the links that modify your data.
Refactor
Refactoring is the art of enhancing an existing code’s design without altering its external behavior. You improve at it via practice and adequate training, just like everything else.
A recap of our PostsController.
# app/controllers/posts_controller.rb

class PostsController < ApplicationController
  def index
    @posts = Post.all
  end

  def new
    @post = Post.new
  end

  def create
    @post = Post.new(params[:post].permit(:title, :content))
    if @post.save
      flash[:notice] = 'Post created successfully'
      redirect_to posts_path
    else
      flash.now[:alert] = 'Post create failed'
      render :new, status: :unprocessable_entity
    end
  end

  def show
    @post = Post.find(params[:id])
  end

  def edit
    @post = Post.find(params[:id])
  end

  def update
    @post = Post.find(params[:id])
    if @post.update(params.require(:post).permit(:title, :content))
      flash[:notice] = 'Post updated successfully'
      redirect_to posts_path
    else
      flash.now[:alert] = 'Post update failed'
      render :edit, status: :unprocessable_entity
    end
  end

  def destroy
    @post = Post.find(params[:id])
    @post.destroy
    flash[:notice] = 'Post destroyed successfully'
    redirect_to posts_path
  end
end
Reminder:
The main principle of every language, including Rails, is
Don't repeat yourselfor more formally abbreviated asDRY.
In our PostsController you can see that we uses find in almost all the actions. A workaround with that is separating it in another method and call it when the action that needed it is performed. We can do so by using before_action.
Read Carefully:
The
before_actionis filter method forcontrollersand just as it’s name implies, will call a method you specifiedbeforetheactionof your controller is performed.
Another thing that we can see is we used the permit twice, therefore we can also refactor it.
# app/controllers/posts_controller.rb

class PostsController < ApplicationController
+ before_action :set_post, only: [:show, :edit, :update, :destroy]
+
  def index
    @posts = Post.all
  end

  def new
    @post = Post.new
  end

  def create
-   @post = Post.new(params[:post].permit(:title, :content))
+   @post = Post.new(post_params)
    if @post.save
      flash[:notice] = 'Post created successfully'
      redirect_to posts_path
    else
      flash.now[:alert] = 'Post create failed'
      render :new, status: :unprocessable_entity
    end
  end

- def show
-   @post = Post.find(params[:id])
- end
+ def show; end

- def edit
-   @post = Post.find(params[:id])
- end
+ def edit; end

  def update
-   @post = Post.find(params[:id])
-   if @post.update(params.require(:post).permit(:title, :content))
+   if @post.update(post_params)
      flash[:notice] = 'Post updated successfully'
      redirect_to posts_path
    else
      flash.now[:alert] = 'Post update failed'
      render :edit, status: :unprocessable_entity
    end
  end

  def destroy
-   @post = Post.find(params[:id])
    @post.destroy
    flash[:notice] = 'Post destroyed successfully'
    redirect_to posts_path
  end
+
+ private
+
+ def set_post
+   @post = Post.find(params[:id])
+ end
+
+ def post_params
+   params.require(:post).permit(:title, :content)
+ end
end
Partials
Another approach for dividing the rendering process into more manageable pieces is partial templates, which are typically just referred to as partials. You can relocate the code for presenting a certain section of a response to its own file by using a partial.
Having an identical forms for our new and edit views, we can make use of partial to refactor it. Let’s take the common codes and make a partial named _form.html.erb.
<!-- app/views/posts/_form.html.erb -->

<%= form_with model: post do |form| %>
  <% if post.errors.any? %>
    <ul>
      <% post.errors.each do |error| %>
        <li><%= error.full_message %></li>
      <% end %>
    </ul>
  <% end %>
  <div>
    <%= form.label :title %>
    <%= form.text_field :title %>
  </div>
  <div>
    <%= form.label :content %>
    <%= form.text_field :content %>
  </div>
  <%= form.submit %>
<% end %>
Read Carefully:
In order to render a partial as part of a view, you must use the
rendermethod within the view. Therendermethod typically handles the labor-intensive task of generating your application’s content so that a browser may use it.
<!-- app/views/posts/new.html.erb -->

  <h1>New Post</h1>
- <% if @post.errors.any? %>
-   <ul>
-     <% @post.errors.each do |error| %>
-           <li><%= error.full_message %></li>
-     <% end %>
-   </ul>
- <% end %>
- <%= form_with model: @post do |form| %>
-   <div>
-     <%= form.label :title %>
-     <%= form.text_field :title %>
-   </div>
-   <div>
-     <%= form.label :content %>
-     <%= form.text_field :content %>
-   </div>
- <%= form.submit %>
- <% end %>
+ <%= render partial: 'form', locals: { post: @post } %>

  <%= link_to 'Index', posts_path %>
<!-- app/views/posts/edit.html.erb -->

  <h1>Edit Post id: <%= @post.id %></h1>
- <% if @post.errors.any? %>
-   <ul>
-     <% @post.errors.each do |error| %>
-       <li><%= error.full_message %></li>
-     <% end %>
-   </ul>
- <% end %>
- <%= form_with model: @post do |form| %>
-   <div>
-     <%= form.label :title %>
-     <%= form.text_field :title %>
-   </div>
-   <div>
-     <%= form.label :content %>
-     <%= form.text_field :content %>
-   </div>
-   <%= form.submit %>
- <% end %>
+ <%= render partial: 'form', locals: { post: @post } %>

  <%= link_to 'Index', posts_path %>
We are now done with CRUD.